
I put together this informational post on how I photograph my cards for my blog. I have learned a lot since my early blogging days and am happy to pass it along :)
Camera: This is the camera I am currently using, however, I am a firm believer that it is not the camera that gives you better photos!!! A point & shoot will work just fine.
start off by learning how to use your camera (I used the auto button for years before learning how to operate my camera), Now I shoot in manual, which give me much more freedom and flexibility than automatic. If your camera has a manual setting I encourage you to play around with it and learn how to shoot manually. This class helped me tremendously!!!
White Balance: the definition of WB is right here. This feature is usually under the menu options on your camera. Because different types of lighting give off different color it is important to set your WB on your camera (this is the reason why some photos look blueish or yellow). Most of the time auto is fine, but if I am using artificial lighting I will usually change it.
Settings: Use the Macro setting (or Manual) on your camera (Macro is indicated with a flower symbol, Manual is indicated with an M), for close up photos. Make sure to focus on the center of your image and keep your hands as still as possible to avoid blurry photos. I tend to fill the frame of my camera with my image (less to crop later). Take a few photos, even if the image looks good in the live view (sometimes that little view can be deceiving).
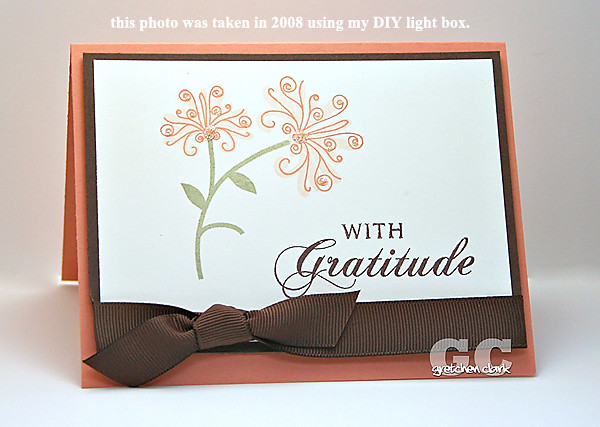
Lighting: Natural lighting is always best, but lets face it, a lot of times I am photographing my card at 8pm at night. I use this light box, but for the first 2 years of blogging I used a DIY one, instructions are here. Make sure your image in not in direct light to avoid shadows. Once you find a setting and lighting situation that works well for you~use it all the time to keep the consistency in your photos.
Here is an example of my old set up (DIY light box):
Here is my current set up:
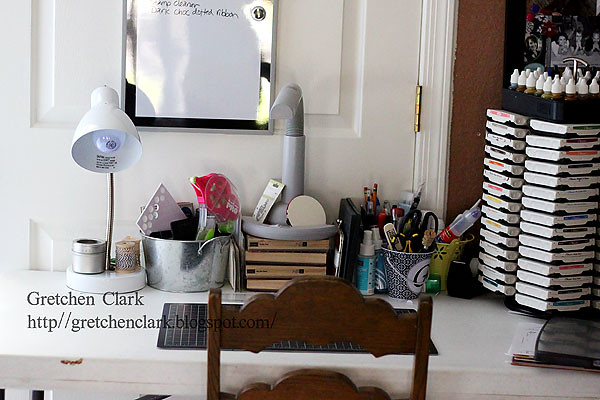
my desk
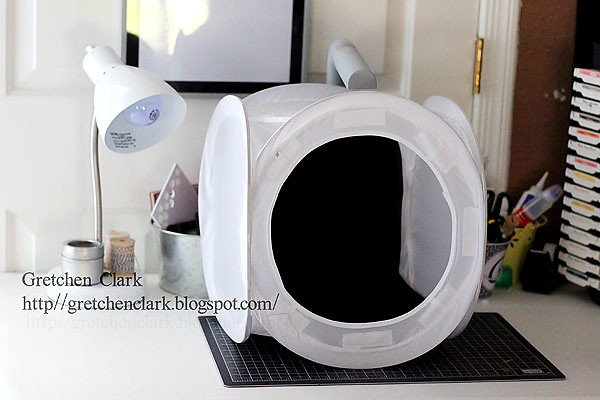
light box (I keep my lights in the same position always~which makes it easier to get the consistant lighting I want).

my card is ready for it's photo shoot :)
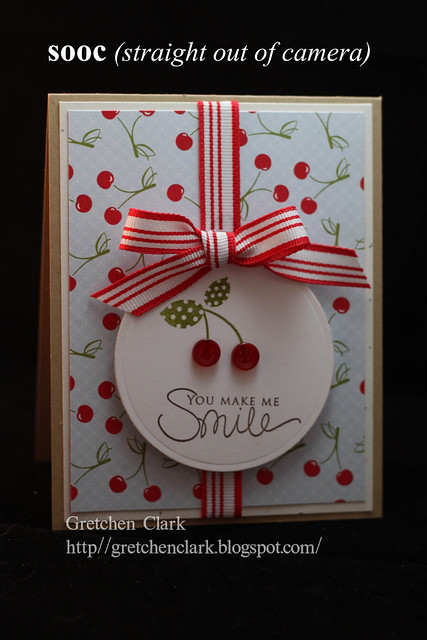
Backgrounds: Choose a background for your item that will "pop" your image. I personally like black, but that is just my preference. Think contrast!! You want to stay away from background colors that are similar in color to your card, which makes it hard to see.
Other tips: Take photos from various angles, top or side. And take lots of photos. I usually find that out of 5-10 images, I usually have one that is "blog worthy", meaning it is in focus and the color looks good.
Editing: I currently edit my photos with Photoshop CS4 (if you have a student, of any age, in the house you can get it at a huge savings here.). I originally started off with Elements (Elements 4 to be exact), and that is a great program as well. There are also free programs out there that I hear work great, like this one.
Once I upload my photos into CS4 I usually always adjust the brightness and contrast to my liking. Once I get my photo looking the way I like, I crop it (I usually do an 8x10 crop, because I like the square shape). Then I watermark my photo (I made my watermark into a brush, which is kind of like a stamp, in Photoshop then I just stamp it onto my image, instructions are here.). Then I sharpen and resize my image for the web.
Here is an example:
Sharpening: photos for web viewing usually requires sharpening and resizing. I use an action that I LOVE!!! (action-is a series of steps recorded in photoshop~like a shortcut, that you load into the program and hit play and let it do the work for you). The action I use is called Heidi's resize and sharpen, which is a free download, but the only way to get it is to become a member of the http://www.ilovephotography.com/ forum (which is also free to join). If you have Photoshop or Photoshop Elements and want to download the action, sign into your account at ilp and then find the link here. This action will also resize your photo to 72 dpi so the file does not take forever to upload and cannot be printed.
Flickr: Once my photo is sharpened and resized, I upload my photo to Flickr and copy the large file size html code for my blog, then paste. Step by step tutorial here.
Remember: Taking good photos is a learning process (which I am a student), Enjoy the learning process, of course it is natural to be frustrated (luckily digital photos can easily be deleted and don't cost anything to take)~but if you stick it out you will be rockin' that camera!!!
ok~go take some pictures!!!
6 comments:
THANK YOU SO MUCH GRETCHEN! That info is so super helpful! I'm gonna give a few of your tips a try!
Karen
x
Thanks Gretchen, I have printed this post out so I will have it handy next time I take photos! I am yet to get out of auto mode myself ;) And I always take my pics during the day too because I can never get the lighting right at night!
Awesome! Thank you so much~~~
Great one Gretchen, serves as a good guide. I'll spend more time at your blog soon!
-Kelvin-
Yes it's true it doesn't matter how expensive the camera is but it is how you deal with your camera,how your captured the subject and the paper used in printing the pictures.
EPSON Premium Glossy Photo Paper
Post a Comment